Publishing to Steam
The Publish Tool on the Steam Dashboard packages your game, writes Valve’s build scripts and uploads the build with SteamCMD, without leaving the editor. It is an editor tool only; nothing of it ships with your game.
- Before you begin
- 1. Install SteamCMD
- 2. Log in once
- 3. Depots and branches
- 4. Publish
- 5. Confirm
- 6. Watch it run
- Where the files go
- When it fails
Before you begin
- Your own App ID and depots. Create them on the Steamworks partner site. Spacewar (
480) cannot be uploaded to. - The App ID is set in Project Settings > Plugins > Sandwich Steam (see the Quick Start).
- A Steam account with upload rights for that app. Valve recommends a separate build account.
The screenshots on this page use the author’s own App ID and a branch called
DevBranch. Yours will show your own.
The dashboard’s Setup page lists the publishing steps in order (SteamCMD, Steam account, Depots & branches) with one button each. The sections below explain them.
1. Install SteamCMD
SteamCMD is Valve’s command line tool that uploads builds. The dashboard downloads it for you.
- On the dashboard’s SteamCMD page, click Download SteamCMD.
- A window shows exactly what will happen: the download address, where it is extracted, and that your settings are not changed yet. Click Download.
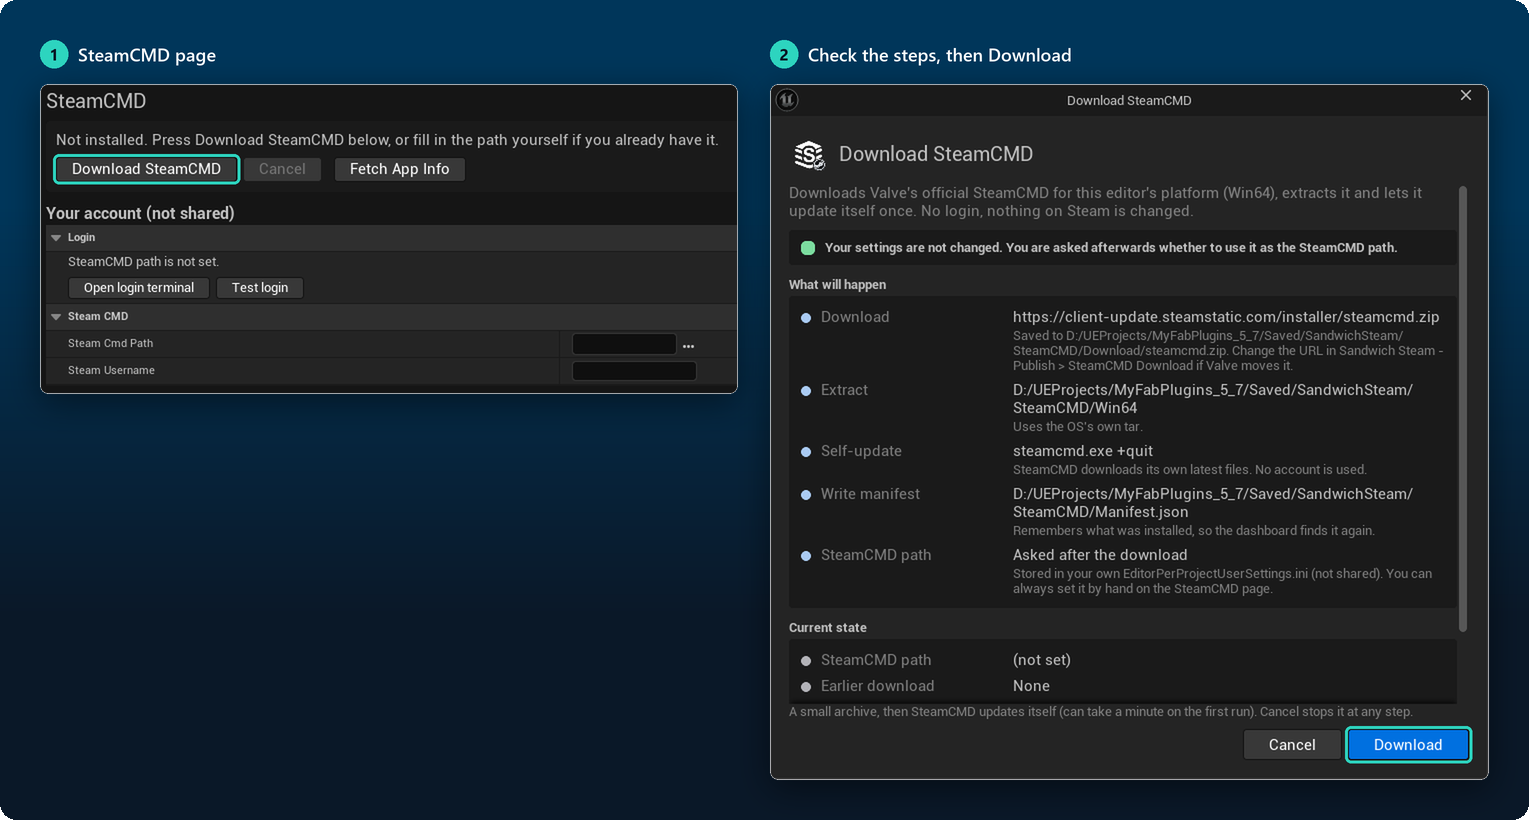
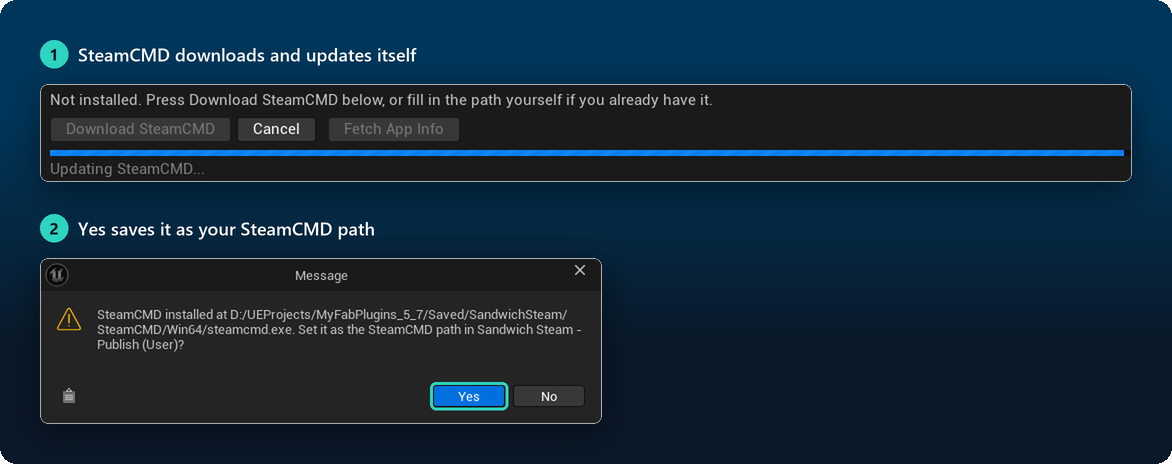
- SteamCMD downloads and updates itself once. This can take a minute the first time.
- When asked whether to use it as your SteamCMD path, click Yes.
Already have SteamCMD? Fill in Steam Cmd Path on the SteamCMD page yourself. The path and your account name are saved only for you (
EditorPerProjectUserSettings.ini), never in the shared project settings.
2. Log in once
- On the SteamCMD page, fill in Steam Username.
- Click Open login terminal. Type your password and Steam Guard code in the terminal, wait for
OK, then typequit. - Click Test login to check it.
SteamCMD remembers the login. The plugin never sees, stores or sends your password. If Steam asks for a Steam Guard code during an upload, a dialog opens for it.
3. Depots and branches
On the Publish page, open the Setup tab. It holds the settings the whole team shares (saved in DefaultEditor.ini, so commit it):
- Depots: one per platform, with its Depot ID from the partner site, content folder and exclusions.
- Branches: the branch names you upload to, and whether a build goes live on them right away.
- Build: the Default Configuration the Publish page starts with, the build description, optional pre and post steps, and Target Name if your project has more than one game target.
Fetch from Steam on the dashboard’s Setup page (or Fetch App Info on the SteamCMD page) reads your depots and branches from Steam and fills them in.
4. Publish
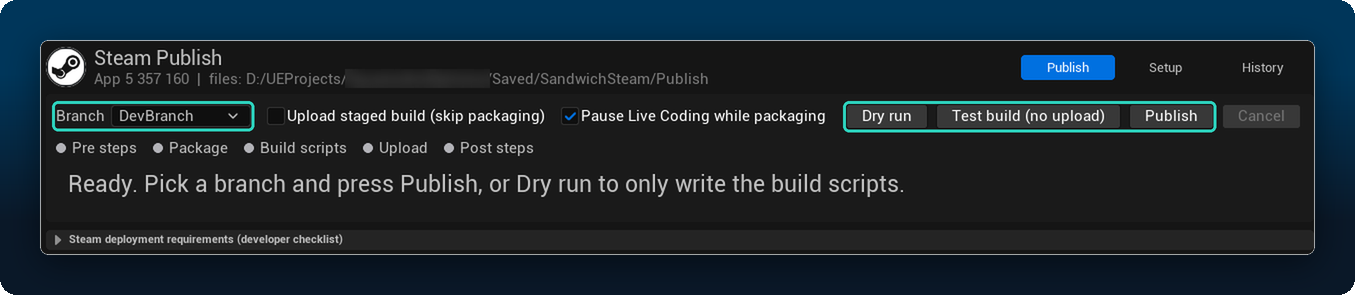
On the Publish page, pick a Branch and a Configuration, then choose what to run.
The configuration starts from Default Configuration (Setup tab). Picking another one only affects the runs you start from this page, and the shared setting stays the same:
| Configuration | Use it for |
|---|---|
| Shipping | Players. Best performance, with console commands, stats and profiling tools removed |
| Development | Testers. Nearly as fast, and keeps console commands, stats and logging |
| DebugGame | Debugging your own C++ game modules. Game code is built without optimizations, the engine stays optimized. Needs a C++ project |
The pre-flight checks warn when a Development or DebugGame build would go live on a branch right away.
Then choose what to run:
| Button | What it does |
|---|---|
| Dry run | Checks your setup and writes the build scripts. Nothing is packaged or uploaded |
| Test build (no upload) | Everything except the upload: packages the game and writes the scripts. Use it to check packaging first |
| Publish | Packages, writes the scripts and uploads to the branch |
Tick Upload staged build (skip packaging) to reuse the last packaged build instead of packaging again.
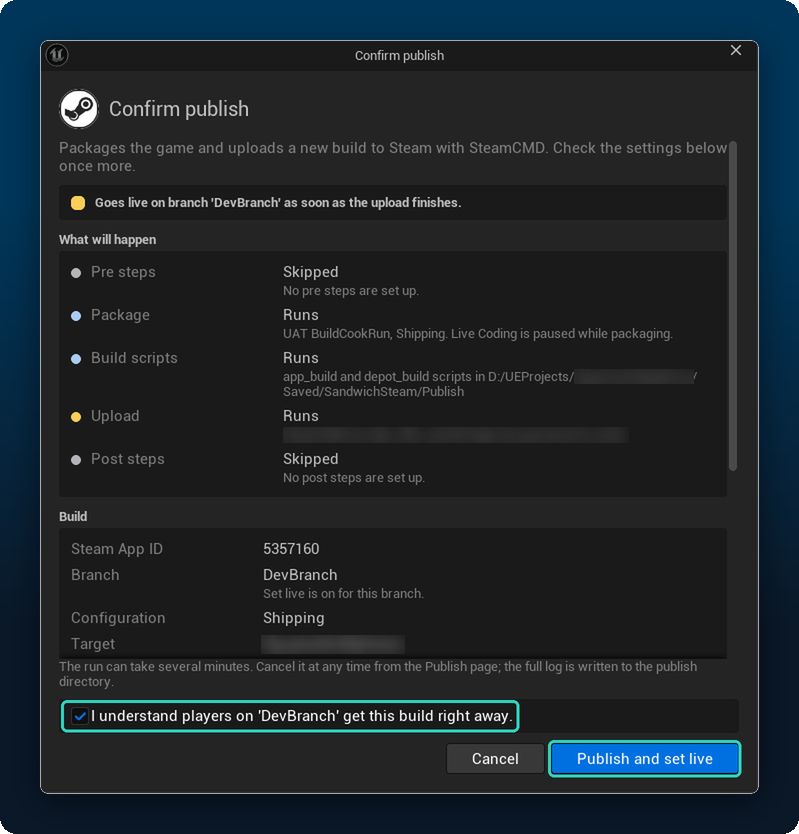
5. Confirm
Before anything runs, a window lists every step, the build settings and any warnings. If the branch goes live right away, tick I understand… to enable Publish and set live.
6. Watch it run
The steps light up one after the other: Pre steps, Package, Build scripts, Upload, Post steps. The log streams live below them, and Cancel stops the run at any point. When it is done you get the BuildID and a notification.
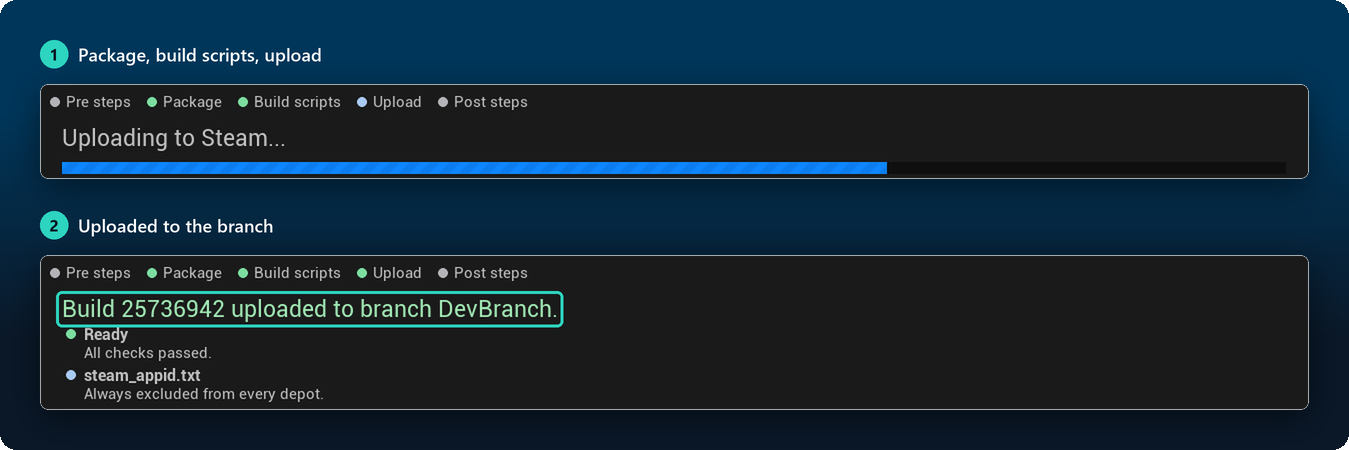
The History tab lists every run with its result and BuildID. steam_appid.txt is always left out of the upload.
Where the files go
Everything the tool writes is in one folder, Saved/SandwichSteam by default (change it with Data Directory in Project Settings > Plugins > Sandwich Steam):
| Folder | Holds |
|---|---|
SteamCMD/ | The downloaded SteamCMD |
Publish/ | The build scripts, SteamCMD output, a log file per run and the history |
StagedBuilds/ | The packaged game that is uploaded |
When it fails
- The run stops with the reason in the log. The same errors are listed in the Message Log (category Sandwich Steam), and the full output is in
Publish/Logs/. - SteamCMD asks for a password: the cached login has expired. Do step 2 again.
- The uploaded Shipping build has no Steam when you double-click its
.exe: that is expected. Shipping builds get Steam only when started from Steam. See Troubleshooting.